Pages

Showing posts with label reclaimed wood. Show all posts

Friday, January 1, 2016

Happy New Year

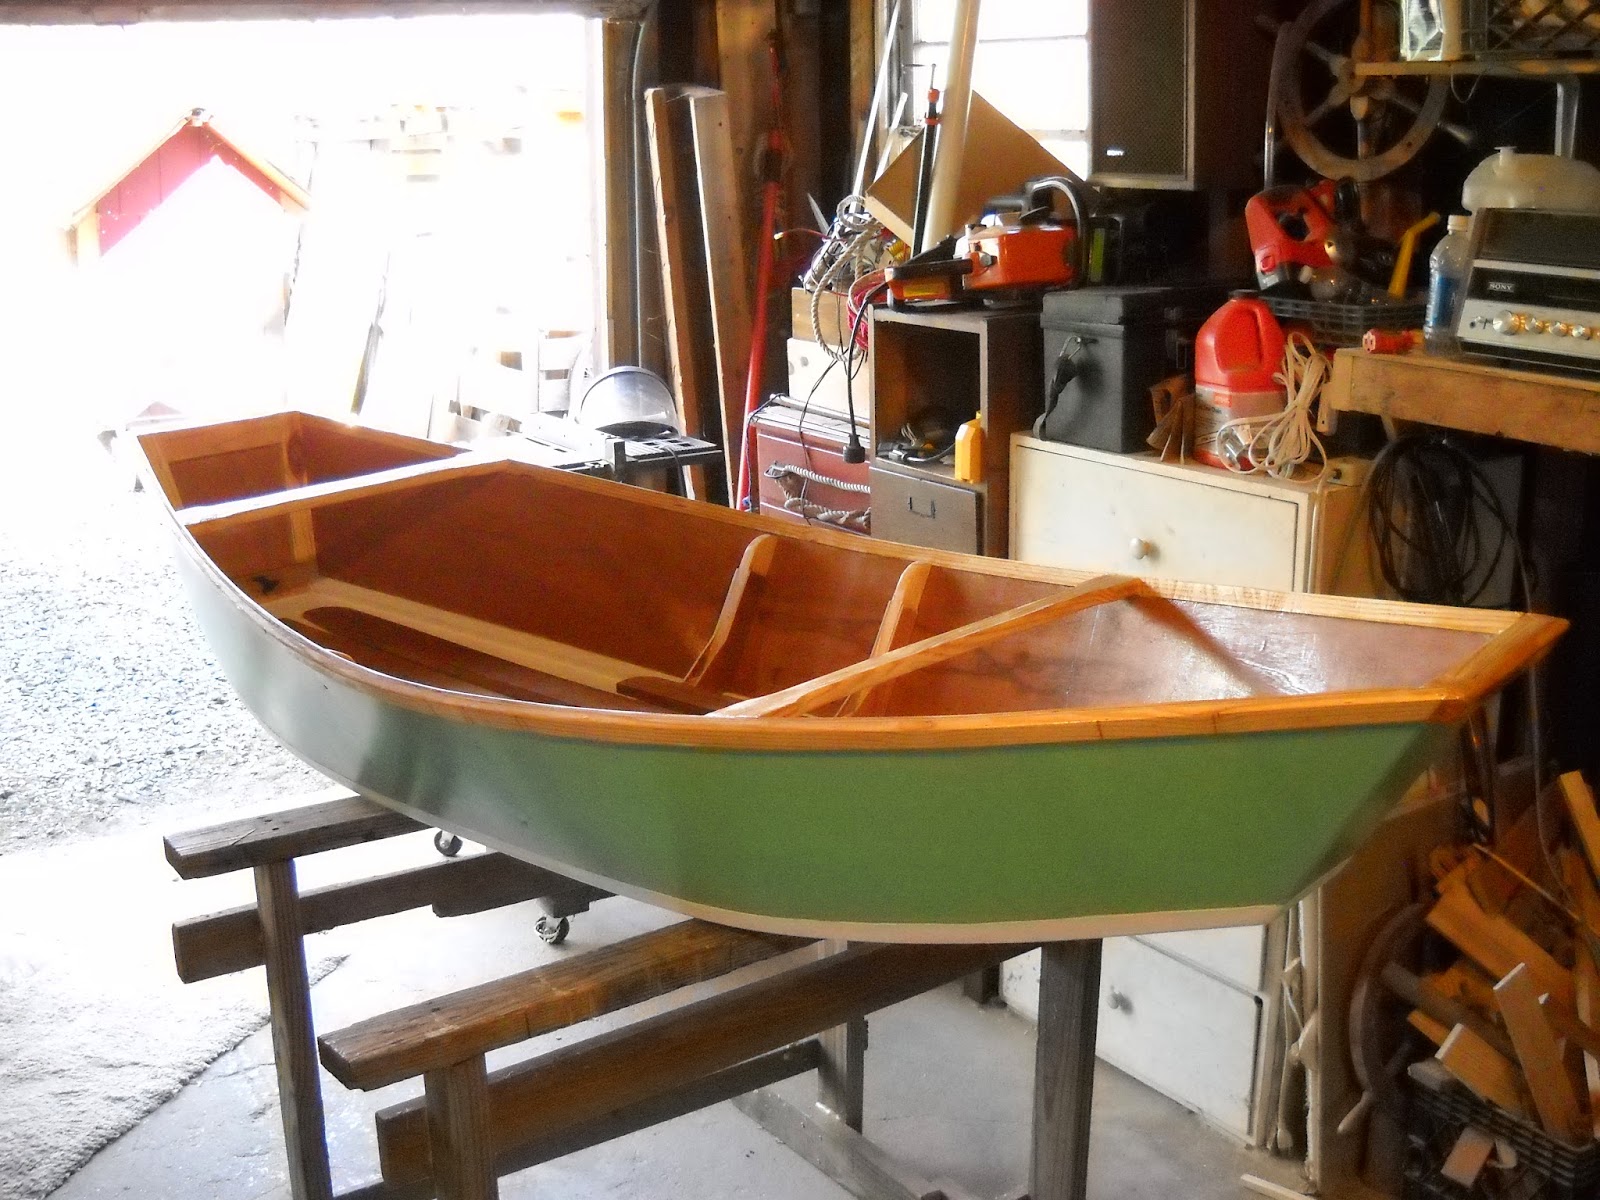
Keeping with my tradition of trying to get out on the water, first thing, first day, of the new year, I took the pram down to the pond and went for a row.  Lots of cloud cover, temps in the high 30'sf, but comfortable and the water was wet, as oppose to frozen.
It's a good way to start the year, and to plant a seed for what might be in store for the rest of the year.
Happy New Year!
First row of 2016
The more I use this little boat the more comfortable I am with it and the more useful it seems to be.  What I took as instability when I first got in here I now realize was initial instability, like any narrow boat, a canoe, or kayak for example.  She stiffens up pretty solidly at about 15 or 20 degrees I'd guess.
I am actually surprised that I have not come across many more documentations of this type of boat.  For the person on a budget you can't get much cheaper.  The one sheet of plywood that it requires cost $14.00, and the rest was of the wood was gotten from scrap, but an 8 foot 2x4 would probably have covered the chines and gunnels and another the framing, and you'd have left overs.
This boat seems to be a good answer to needing a tender for a small cruising yacht, as would a kayak but this boat is open and could haul a bit more water or supplies to and from the mother ship.
The wooden floor is down in the shop now so I am just about ready to start setting up for building.  I have become convinced that I should do some work on the skiff.  All these books I've been reading about american heritage small boats, especially the Sharpie's, has me thinking that adding a centerboard to the skiff will produce a decent sailing boat.  We'll see.

Wednesday, December 9, 2015

TART?

     Last night I took the basic lines measurements of the WEE PUP and then drew a boat plan that was built like my pram.  The lines drawing looks good, and not so much different from my TARTLET.  The two boats are the same LOA, but the beam of the PUP is a few inches greater,  and on the bottom, a lot fuller.  I am considering building this hybrid, I'd call it TART, just to reference the first boat.  The reason I'd think about building the boat in this style is because it is a nail and glue with a chine log, rather than a stitch and glue as the PUP calls for.  This way I can build it in the cold of winter, if it ever gets cold, because the polyurethane glue I use, GORILLA GLUE, can be used in the cooler temps whereas epoxy needs the 60 degree minimum.  It is sometimes to keep that room above 60 in the really cold times.
TART?
I also really like the direct simple building method.  I use both fasteners, screws, and glue to affix the plywood panels to the solid wood chines and frames.  This both glues the surfaces and works as a caulking of a sort, since the GORILLA GLUE, foams and expands.

When Winfield Thompson had his first WEE PUP built the boat builder asked "Where would you like you tub delivered?".  It is kind of tubby, but the lapstrake sides help to let you know it's a boat.  With the version, that I am thinking of, it would just look like a tub.  Well what can I say, after all, TARTLET, looks like a coffin, truly.  If you were going to build a coffin that is what it would look like.
Despite the not exactly elegant look of this boat to be, it should serve very well it's task, if it's predecessor's utility can be used as an indication.  TARTLET is a great boat for the pond.  This boat is to be light and easily portaged, just like TARTLET, but fuller and more seaworthy for use on the river, and capable of carrying a passenger.

I found a forum on the use of Luan plywood for boat building.  The gang on the WoodenBoatForum  didn't think Luan of much use in boatbuilding, or most of them did.  There were one of two who realize it's limitations and use it anyway.  So, I'm not alone in this attitude.
It's been a few seasons now and those boats all seem to be holding up well.  They are treated pretty well, being stored in the barn and dry sailed.  I'm not timid with them though.  A few days ago I rowed the pram full tilt, right onto a log that was just below the surface and covered in barnacles.  The scraping sound along the bottom was a bit sickening, but late when I looked at the bottom the fiberglass armor (3oz. clothe) was barely scratched, in fact I had to look twice to find it.

Tuesday, September 15, 2015

Plank, Oar, spar? Or all of the above

A month or so ago a crew was down the road taking down a bunch of trees that loomed over a neighbors house.  I got them to drop off the wood and wood chips at my place.  Most of the wood was cut up for fire wood but I had them leave five logs of a Spruce at lengths of 10 feet and they dropped them of for me as well.
I have begun milling the wood for future projects.
10 foot Spruce logs sitting in my driveway.  The one is a
good 2 feet in diameter. (in the background is the
temporary boat barn that has now been up 5 years)
I am thinking of using the wood for small boat spars.  I have built laminated solid spars and I think they work pretty well, though I'd like to try a "birdsbeak" hollow spar for a mast for the skiff.
I think I could also make some long rowing oars with this wood.  There is also the possibility of using it as planking in either a traditionally built boat or a strip plank hull.
The first two planks are about 18 inches by 10 feet by 2 inches thick
 I am storing them vertically for now.  I saw a video on OCH and in it Harry Bryan stores his cedar planks this way.  It allows for easy inspection and there is not much concern for that kind of wood changing shape as it dries. I don't know that I will leave them like this but for now it's convenient.

I am making a lot of saw dust, or shaving. which will be stored and then used as litter for the chicken coop.
 I am using a 16 inch electric poulan chain saw for the work.  It isn't ideal but it works pretty well and, I don't have to smell the exhaust of a combustion engine.  The nice thing about the electric is that when I release the trigger, it's off, and the torque it constant.  This saw was given to me by somebody clearing out there garage and it works pretty well.  I rather save my Stihl for the work where electricity is not available.
It is strange to see it looking more like lumber than a tree.
I had considered buying an attachment guide to help with the work but I saw some videos of guys, probably in the Philippines, doing using a chainsaw free hand and cutting these lovely hardwood planks, so I figured I'd try it.  I am glad that I did because the work has come out fine, or at least good enough for me.  The key is to go slow.  Using a chalk line to mark off the log helps to give continual reference for straight, at least in one dimension.

I'd love to be able to build an entire boat this way, and maybe this is enough wood to actually do it.  I don't know yet.  The next boat I want to build would be my trailerable cruiser, so something in the 15 to 17 foot range.  With 10 foot planks I suppose it is still possible with scarfs, or if I build a strip plank hull.  A strip plank hull seems like a really good idea, It is still a wood boat but no need to worry about seams opening up if it is dry sailed and having a limited supply of long clear wood does not preclude that style of construction.
I have read that Spruce is not the best for rot resistance, but I have it and nothing lasts for ever anyway, and I am OK with that.
I think a good 9 foot set of oars will be the first thing to make, or a new mast for the skiff.  We'll see.

Friday, December 12, 2014

Nav table cabinet

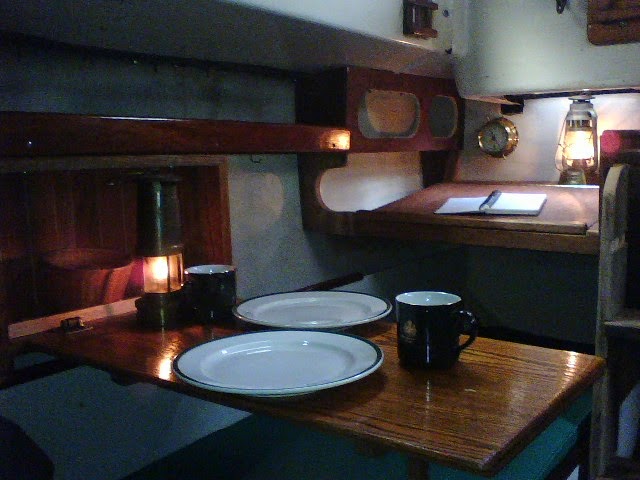
Well today I got the basic cabinet installed, well, put in place or dry fit.  I am pretty happy with the result, but for the problem of the stain on the wood not matching the rest.  I may end up having to start over with these two pieces, but if I do at least I can use these as templates.
I wasn't planning on putting doors on this cabinet, but I may yet.  The doors would affect the clearance of the lifting desk lid to some degree.  It is something I don't need to worry about right now.
New additions Starboard side.
It is very satisfying to see at least a little progress every few days.  We haven't even hit winter yet (9 days til the solstice!) and even so I feel as though so much has gotten done.  The interior of the boat feels as if new and has really change the character of the boat down below.  It also has made the boat feel more mine, or more of a reflection of me.

Saturday, December 6, 2014

Tut tut, it looks like rain!

Still more gray and wet days.  Seems as though I don't remember when I last saw the sun.  It hasn't been that long, I am just being a bit dramatic.
I did use the gloomy weather to get some work done in the shop.  I got the "hanging knee" fashioned for the cabinetry at the navigation station.

Nav station and first stages of the cabinet/shelf.
I still need to do the finish work as in sanding and stain and varnish but the varnish won't happen until Springtime.  Now that the knees are fitted and thus the dimensions of the upper shelf established and locked in, I can now work on the cabinet itself.  The wood is the same reclaimed stuff that I have been making all of the trim in this project from, so I hope that it will tie all of the new accommodations together nicely when finished.

I found some high density foam pieces with a fabric backing on it.  It is often sold as "interlocking rubber tiles with a berber covering" and I found that it works wonderfully as a floor cover in the cabin.  It is nice to walk upon, and stiff enough to hold it's shape and not bunch up or slip the way a rug might, and it insulates the cold floor amazingly well.  I would recommend it to anybody using their vessel in colder weather.  It also has a nice clean appearance to it that makes up for it not being wood.  Because it is so stiff cutting it to size holds it within the fiberglass pan that the cabin sole sits within.  I found mine in somebodies trash but having used it wouldn't really hesitate to have to buy it, and in fact I may purchase some more just to cover other parts of the hull that need insulation, for temperature or sound.  It could keep items from chaffing the inside of the hull and it floats.
The cabin has become very cozy and is a nice retreat even while sitting in the boat barn on dry land.  I have to take my consolations where I can, especially this time of year.
The gray floor covering is made from rubber, interlocking tiles
with a berber facing.  It's warm, soft, good traction, and clean looking.

Saturday, November 15, 2014

Table cabinet is done!

Today I installed the cabinet/shelf/table mount.
New folding table/cabinet.
The cabinet is made from oak shelving that I found discarded.  It is on the heavy side but not to a fault, just so that it feels substantial.  The back of the cabinet is paneled with the same wood that I milled down and put a bevel on the edges.  I don't have the means to make a tongue and groove joint, but the bevel seems to work fine.
The cabinet is attached to the shelf above it with 4 bolts and to the back rest of the settee with 2 screws. It joins all these pieces together and make them stronger.
The fiddle has to be stained and varnished yet
I will probably make a fiddle that goes half way up the cabinet for those times when sailing rail down.  I am still playing with the idea of making some doors to close up the whole space, but it seems a bit much for such a small space.
The new cabinet and folding table mount.

Wednesday, August 13, 2014

cabinet maker?

For the past two days I have been enjoying working on Waneeshee's galley arrangement.  My Bristol 27 came with the standard cruising model set up, the galley under the companionway athwart ship with the icebox to starboard, sink, and then stove to port.  Since I opened up the passage going aft so as to access all the storage space under the cockpit I have not settled on a new galley arrangement that made me happy, but I think I have found a set up that will.

I have taken the sink and move it forward of the stove on the port side.  This arrangement will leave the port side berth available, but the settee will no be only capable for seating one person between the sink and the wood stove.
The sink is elevated so as to keep the plumbing from blocking the berth and also to make the sink a comfortable working height when standing.  Because of the elevated sink counter, the stove area is now in a well of sorts and this will add to the security of the pots and pans and such.  With this arrangement I can actually stand up and cook,  which is much more natural for me than sitting.

Building the new sink counter was a new step for me in two ways.  Firstly, I am not using any power tools for the job.  I have been inspired by the many fine carpenters I have read of, and seen on videos on Youtube.  I am no where near the skills that these men posses but I can only get there by trying.  The joy of not hearing the whine of power tools is great for me and the extra time needed for each cut, for each hole drilled, and for every measurement taken is helping me to be more precise and patient.

So far this counter/cabinet is probably the tightest, strongest joinery I have every done.  No glue, yet, just screws and even so it is all solid.  I will use some glue after I have got all of the assembly worked out, then I will unscrew it all and glue it up and refasten it.

So far, all the materials are reclaimed.  I'd like to keep it that way, but I may have to buy a piece of plywood for the facing.

It is very good to be building again, and more so because it is the Bristol that I am working on.

Thursday, July 31, 2014

New Mainsail and sprit

No photo editing, it's done and smaller.  Now the sprit and mast fit in the bottom of the boat, but with one hatch open.
The new reduced rig!

Friday, July 25, 2014

Skiff work

Today I cut down the sprit yard, got the mainsail set up for stitching, and installed a "keeper" for the rudder, to keep it from floating out of it's gudgeons.  I made the rudder lock, I guess I could call it, out of some yellow pine and a bronze screw.  It is a teardrop shape and hangs from the transom just above the upper pintle.  It can be swung out of the way so that the rudder can be placed or removed but hangs in a way to keep it in place the rest of the time.  Simple.  I may start stitching up the sail tonight, shouldn't take long to do the seam but the patches and attachment points still have to be worked out.

Friday, July 11, 2014

Rudder mounted on skiff!

Today I got the pintles on the rudder and got the rudder mounted on the skiff.  I am using a push~pull stick rather than a tiller.  This makes more sense for a small boat.
tiller is cedar and the push pull stick is yellow pine
 I got this idea from Ian Oughtred's Caldonia Yawl.  I have seen other vessels use it too.  The stick allows movement fore and aft to balance the boat, and keeps one from having to duck under the tiller or lift it over your head.
The "arm" is slotted thru a square hole and a peg keeps it in place.  I used a chisel to cut the square hole in the tiller.  I may change out the peg for a wedge.  A piece of line attaches the arm to the stick and serves as a universal joint.  Simple, cheap, affective, and it even looks kind of right.  I fashioned the gudgeons out of scrap stainless steel plate, but I bought the pintles.  The pintles are set in a dado.  I hope to paint the bottom of the rudder white, put a red stripe above the water line and varnish the upper section and the steering arm and stick.  I also need to put a "keeper" or lock on the top of the pintle to keep the rudder from floating up.  I have seen simple metal tabs that pivot on a screw but I might consider a piece of shock cord, in case of grounding so as not to rip apart any of the wood or fasteners.  I will probably build a longer push-pull stick later.  This one is about 5 feet long and a 7'-6" one would fit stored in the cockpit and might allow for steering while working at the mast.
I got to use my egg beater drill and my brace to drill the holes.  I haven't been using the brace as I have not bits for it, but the set of Milwaukee drill bits I have are 3 or 4 sided so they lock in the chuck on the brace.  It was very nice and quite and more controllable  than the screw gun or electric drill.
I am not sure how well the cedar will due for a rudder.  It is light weight and that is why I am using it, as well as it's being able to handle the moisture.  I will have to watch the stress points, at the pintles and at the steering arm.

Monday, June 16, 2014

WoodenBoat & Launchings!


I got a package in the mail from Wooden Boat Magazine.  In the package was a very nice letter, a copy of issue #239, July/August 2014, a decal that says "Proud Wooden Boat Builder", and a cap with the Wooden boat Launchings Logo and the issue # embroidered on it.  The letter stated that my pram was included in this issue of the magazine.  And so it was when I looked inside.

WoodenBoat Magazine | WoodenBoat, Small Boats, MotorBoats, Getting Started in Boats, and Professional BoatBuilder

I didn't set out to be recognized in anyway when I started building these boats, but the admiration they have received when I launch them at the lake or river and from a few comments on this blog has been appreciated.  It is true that I offered up the pictures and descriptions of the boats, so that they might be noticed, but it was only after I had completed them and been presently surprised by the result and impressed by how easy and inexpensive, and enjoyable the boat building and designing process was, that I thought to share that discovery with others, and see if others saw what I appreciated in these boats.


The Sam Pram, Tartlet

It is fun for me to see the boat in a magazine.  It is still fun and amazing to me each time I put her in the water and climb in, and she floats, and rows, and takes me away from shore to be in that place where men often go, where we are not exactly welcomed, but not turned away, somewhere between beneath the surface, where we can't breath, and below the sky, where we can't fly.  Neither place is really ours to inhabit for very long, but in a boat we can dance between them and for long periods of time.  Even the slightest little boat, such as this pram, is a "magic carpet" that can take us, under our own power, to that place between and a part of sea and sky.

Saturday, May 24, 2014

New rig ideas

I love modern technology sometimes.  I was playing around with the photo of the rig on the skiff and made a quick visualization of what a reduce rig might look like.  So maybe a gaff head, or maybe just a reduced sprit, I don't know yet.  I am kind of leaning toward a gaff, but probably only because I haven't tried one yet.
Old rig

Possible new reduced rig

Thursday, April 24, 2014

Rudder

Today after trying out patterns made from pizza boxes I gut up the glued up cedar.  I then started to shape it by running the router around the underwater part and then planing, sanding, and rasping the edges.

I will need to do a lot more sanding and shaping but what I have so far seems pretty good.
trying it on for size.
I clamped it on to see how it looks.  It is OK.  I would have preferred that the forward bottom corner had a smaller radius for looks, but I chose to go bigger in case we ground out on something the softer curve might make it all go smoother.  I still haven't decided how low the rudder will hang.  I do want it to hang below the keel to get a better bight in the water, but I am worried about it not being protected and about the difficulties of landing the boat with that thing hanging the extra few inches.

Tuesday, January 14, 2014

Maybe it's time to build another boat

A year or so ago I ordered plans for Phil Bolger's famous and lovely dory, the Gloucester Gull.  I already had Herb Payson's building guide pamphlet for the boat.  I think it is time for me to start another build.  The winter blues/depression is coming on pretty strong lately and building a boat is probably cheaper and less self destructive than many other things people turn to to combat depression, i.e. drugs, alcohol, sex, violins (violence), gambling....
I got this in the mail about a year ago
and just looked over them,
and over them.

 I actually had them, or at least the building guide, when I settled on building the skiff.  The skiff was a less technical boat to build and I wanted to give myself as much advantage as possible for completing and being happy with the result.  On hind sight it was the right choice to build the QT skiff first.  The skiff had much more room for adjusting the plan to suit my other needs, like adding a sailing rig.  I did however fail to get a good rowing ONLY boat out of the build.  Unbelievably the skiff is a bit complex for just going for a row on a whim, but just.

With the plans laid out on the shop table I
can start the process of going thru
the build in my head and visualize the whole
process more easily.
With the plans laid out in the shop I took some chalk and marked out the area where I will build the boat.  This lets me know how much room the frame will take up and what rearranging of the shop I might want to do before beginning to lay out wood.  Although the shop is a bit cool this time of year, I can warm it up a bit with the wood stove and leave my plans out and not have to pick them up each evening.  I think eventually I will put them up on the wall safe and out of the way.  I already spilled a little wood glue on them while doing a repair on an old guitar! Doh!
Even though the shop is too cold for epoxy, or for paint even, I can build the entire boat at a nice leisurely pace and by the time I need to do any gluing up or paint the days may have gotten warmer.  I can heat small areas for some small glue ups like the stem which I will have to laminate some pieces together to get a piece large enough.
But first I will have to construct the building frame upon which the stations will be anchored.  Although Herb Payson recommends the one time builder making the station molds from plywood as it uses less material, is less work and simpler, I will build the station frames from solid stock because I have plenty lying about, where as I would have to buy the plywood.  I will have to buy some plywood for the hull of the boat, but I would like to keep the costs down and just as important, I'd try not to use much plywood as it requires a lot of energy to manufacture it, and the wood is often harvested in a manner I am not so happy about supporting.
I got a lot of fir board reclaimed and for free, and I mean a lot of it, so I will use it when I can.  I suppose all the parts of this boat that aren't plywood will be fir.
So here we go again, an ultra light dory meant for recreational rowing by one person.  The lines of this boat are very fine to look at.  Bolger thought that the design of this boat might get him a pass on all of his sins and allow him into heaven, or at least that is what he said.
Don't know what I will do with this boat once it is built.  I do want a good rowing boat, light and fast, so maybe I'll just row it.  Oh Grrrreat another boat, just what I neeeed.  Oh well. 

Thursday, December 19, 2013

Milder weather

We have a batch of warm weather for a few days and I hope to make some good use of it.  Today I went to the boat and installed the new table.  It is completed but for the varnish and I am just going to wait to do that.  For now it is in and I can use it and find out how well it works
completed table.
Folds up for use of bunk.
I took a few minutes to shovel the snow off the decks in hopes of a sail in the next few days.  I made the hinge that connects the legs to the table from some wood and some bronze spikes and roves.  The hinge that attaches the 2 legs to each other is a brass hinge that was handy.  The hole rig can be lifted up and kept out of the way should the bunk below be needed for sleeping, or what ever.  Out board of the table I made a tray to hold what ever needs holding.  Right now it keeps a battery powered led tea light.
The cabin is a long way from being inviting but it is a start and I am in no rush.

Thursday, December 5, 2013

Simplicity afloat

One of the reasons that I think I chose to build the first three boats that I did was because of their simplicity.  That desire for simplicity was not just to accommodate my limited experience as a builder, but also, and more so, to get at the foundation of what building a boat was about.  The boats were simple in design.  The materials were simple and accessible, common, not exotic and not expensive, and mostly left over scrap or reclaimed, even the sail.

By limiting the complexity of the boats it became easier to see what the essentials of any boat was.  By some apparent law of nature it seems that the simpler and most basic brings the greater and longer lasting fulfillment.

The row in the marina basin just the other day reminded me of how pleasing that simple act can be.  I didn't want to get out of the little boat, but I didn't need to be doing much at all in it.  It was enough to just be in it, upon the water.

As I listen to, and watch people around me struggle and grumble with the complex systems of their boats, and their lives, I am reminded of why I have made the choices that I have about what boats, what systems on those boats, and how I keep them.  My goal, ultimately, is to be upon the water in a boat, being happy.  This can be attained by being in my largest boat, with all it's accommodations or in the smallest of my boats with all it's limitations and because none of my boats is so filled with complex and expensive systems I can manage to keep quite a few boats, each with it's own unique application and qualities.

"Simplicity afloat is the surest guarantee of happiness." L. Francis Herreshoff

Wednesday, December 4, 2013

Folding Table for the Venture, sail # 7

Test fitted the table for the Venture 21 today.  My table is capable of folding up and out of the way so that the berth below it can be used, or it can be unbolted from the flange that is glassed into the hull.
salon table for Ventura.
It is yet to have the finish work done.
The angle of the table leg allows for more people leg room.

The leg is yet to receive it's locking brace, but I was just getting the final dimensions for it today.  The sea rails are glued in place with Gorilla Glue.  The box against the hull is glued too.

The table had an immediate affect on the feeling of the space down below.  It filled up the space in a good way and makes me eager to get the other details built for the cabin.  I am allowing myself to do the galley area shelf area this winter,but that will be it so that I can work on other boats.  This boat doesn't need any thing else and it's main priority is to be sailing as much as possible.

Today we went out for sail number 7 of the season.  Not much of a sail really as the wind was not to be felt.  It seemed to die off as I was getting out on to the river and the clouds came in from the west to join the sun as it set in that direction.
Still, I got to raise the genny for the first time, not that it filled much, and I got to test out the modifications on the upper most batten on the mainsail.  Even though the tidal current had us sailing backwards, down river, we were able to sail across the tide and out toward the channel.
Even with out much sailing it was good just to get out and work the boat.  It was a really warm day.

Saturday, November 30, 2013

Hinges

In finalizing the design of the salon table for the Venture I have decided not to use the wooden hinges I had hoped to use.  Using wooden hinges would require a larger hinge than is ideal for this application.  As the table and the boat are small and that space is at a premium I have decided to use a piano hinge that I had lying around.
The table leg will fold against the bottom of the table when the table is stowed.  The leg is a scrap piece of red oak and the "hinge ears" are cut offs from the table top.  The leg will be cut to size when the table is put in place.
the leg will go underneath the table.
The table top will be cut along a line six inches from the outboard end, which is about where the hinge sits in the picture.
All scrap wood and parts.
the sea rails are yellow pine.
The pieces at on the other side of the hinge will be a little box/shelf to hold things against the hull that might be a little bit tall, say maybe a cup or glass or condiments or binoculars or.......Inside the box are the holes that will take the bolts that secure the table to the hull flange that was glassed in at the factory I presume.  I chose not to put a back on the box to allow for access to these bolts, besides the hull will work as a back.

I had to use a scraper to take off the finish on the table top.  I think it was a wax stain.  It just gummed up the sandpaper as I tried to use it, the scraper seemed to be the best way to remove the wax and it was quicker.
A neighbor got the scraper for me at an antiques shop.  In truth, when he brought it to me I wasn't sure I'd find a use for it, but now that I know how to use it, and when, I find that I am really happy to have it.  As he said, it is what they used before sand paper.
I have found good satisfaction from using human powered tools in the shop.  The whir of electric motors, to say nothing of the noise of gas engines, is offensive to me and keeps me from hearing the music I have playing or the thoughts running thru my own head.  The trade for the extra work it takes me is not a cost at all to me as it keeps me active and using my body that would otherwise go soft and lazy or injured easily.

Version 1 of a sculling oar notch
to go on the transom.
Made from a scrap piece off a pallet. 
In my continuous search for redundancy and sensible things, I have started to fashion this sculling notch to be bolted onto the transom of the boat.  The oar I have onboard already is about 9 and 1/2 feet long and in my test of how it would work should propel the boat just fine.  This is a first attempt at the notch and I think I may try again with a more rounded notch rather than this one with such hard corners.  The thought was to capture the oar to some degree but I thing this can be done well enough, even better with a round notch.  The piece is cut at an angle to match, to some degree the angle of the oar shaft as it passes the transom.

The sculling oar will be a big benefit if the engine is either out of gas or fails to perform.  With the cold weather it also allows me not to run the engine and have the possibility of it freezing up in the impeller after it is run.

Tuesday, November 26, 2013

Wooden hinges

One of the winter building projects I am allowing myself to do on Ventura is a folding table for eating/writing at.  The original design had a table and there is still a fiberglassed flange along the hull where it went.  As is my custom, I picked up a table top that was lying in a trash pile, some time ago.  It is going to be the table for the boat.
The thing that is challenging for this project is that I'd like to make the hinges for the table out of wood.  I saw a guy on Youtube build a cabinet door with hinges of wood and now I am wanting to do it myself.
  ▶ Making wooden hinges - YouTube 

I am concerned that a table will have more stress than a small door and will try to make adjustments for that.
Even if I do not have success with the wooden hinges I can still make the hinge out of used and reclaimed parts, as I have a few spare parts to choose from.

I don't have a drill press, well not really.  I have this thing a friend gave me that adapts a hand drill to a drill press.  I am spending a bit of time trying to get it set up to run plum and square.

I did the hinges by eye and free hand with a power drill, we shall see how that turns out.

I love the idea of making many of the new parts out of wood, as there seems to be a lot of it available to me, and I know that the world operated on that level of technology for a long time.  I like mixing the modern fiberglass (but used or reclaimed) boat with wooden and older or simpler parts to fix or replace broken things onboard.